In rare occasions, altafiber might have installed your ONT and thus your Battery Back UP unit on the outside of your home. The Alpha Battery Back-Up Unit is an indoor/outdoor unit able to withstand weather elements. Thus, with the Alpha, in order to view the red indicator light showing a ‘dead’ battery, the cover of the Battery Back Up unit must be removed first.
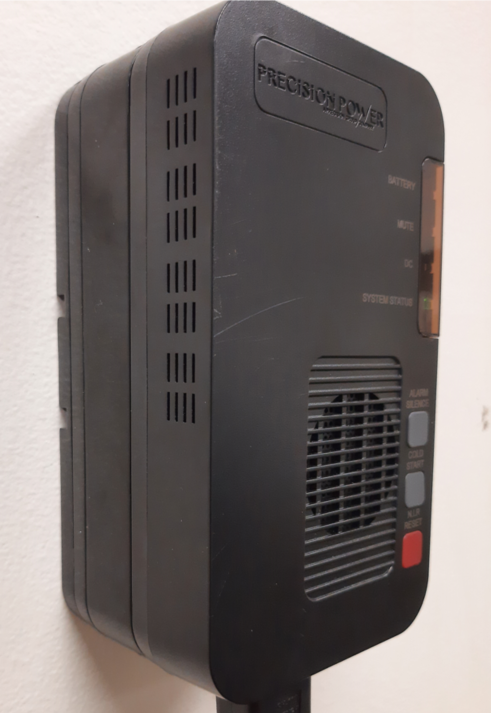
Locate the Alpha Flexpoint BBPS (Batter Backup Power Supply). It is generally located within 10 feet of the ONT location, and may be either inside the home or on the exterior.
 Locate the screw located in the lower right hand corner of the battery access cover. Using a Phillips head screwdriver, turn the screw counter-clockwise to completely loosen the screw. Open the battery access cover by grasping the cover near the screw and open towards the hinges on the left hand side.Inside the RED led light will be on solid to indicate a bad battery, or blinking to indicate a low battery.
 Loosen the hook and loop fastener by gently pulling it loose from the right side, and then pass the loose end through the plastic loop.


 With the battery removed from the enclosure, gently pull the black and red connectors away from the battery terminals to disconnect the battery.
 To re-connect a new battery, slide the connector attached to the black wire onto the black(-) battery terminal, and slide the connector attached to the red wire onto the red (+) battery terminal.
 Insert the battery into the housing, with the terminal connections placed up and to the right side of the enclosure (as shown in the picture above). Pass the end of the hoop and loop fastener through the plastic loop, and pull the fastener tight. Attach the hook and loop fastener by pressing it tightly together.
 Close the door of the battery backup enclosure, and secure by turning the screw in a clockwise direction until tightened. Be sure rubber door seal is in place if your unit is outside.
 For 24-Hour Battery Backup:
With the 24-Hour Battery Backup product, there are additional steps to follow. Please see below:
- To maintain a 24-Hour battery charge throughout your usage of the BBU, swap out batteries and cycle a different battery every month to keep the charge.
- In a power outage, if you lose dial-tone, go to the battery backup unit, remove the current battery and install a charged battery. Keep the charged battery in the unit until you lose dial-tone. At that point, replace the dead battery with a charged battery.
After a power outage event, place each battery used during the power outage into your battery backup unit for a minimum of 24 hours to completely recharge each battery.

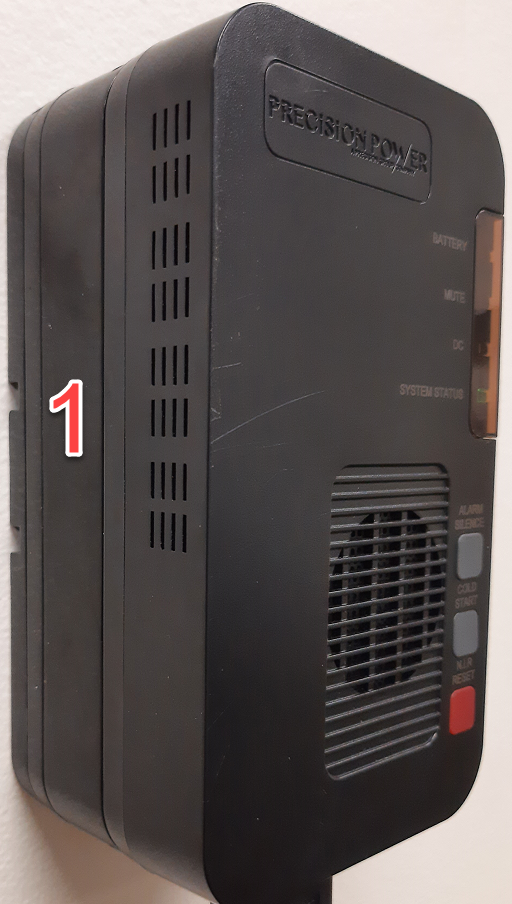
 Slide the front plate upward to remove the face plate and reveal the batteries behind.
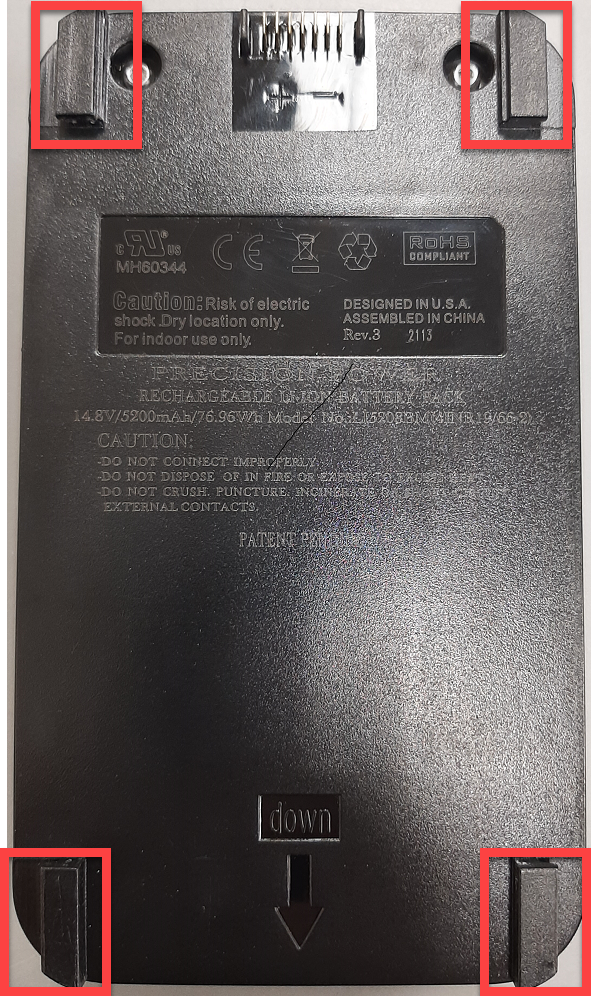 Both the batteries and the face plate attach using 4 corner tabs that slide from the top down.
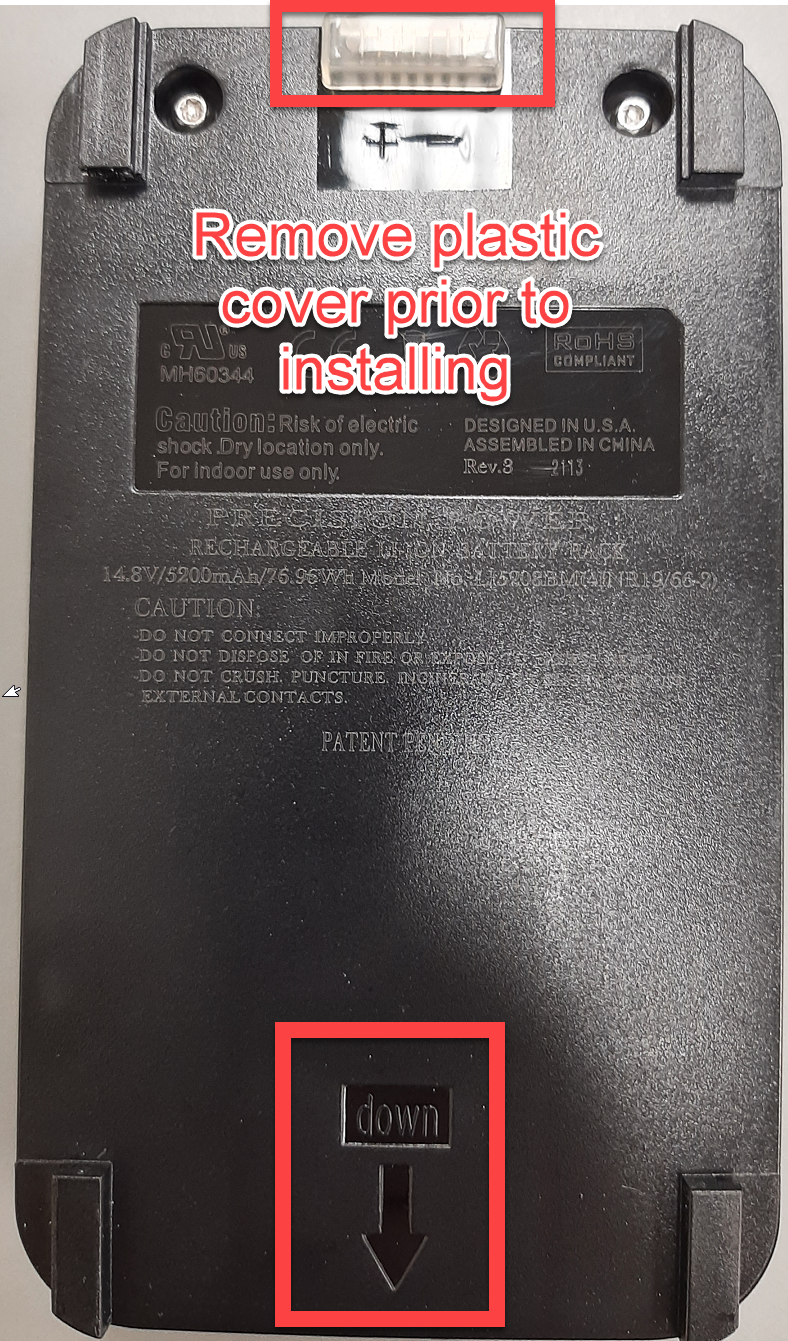 Make sure to orientate the battery with the down arrow facing in the correct direction
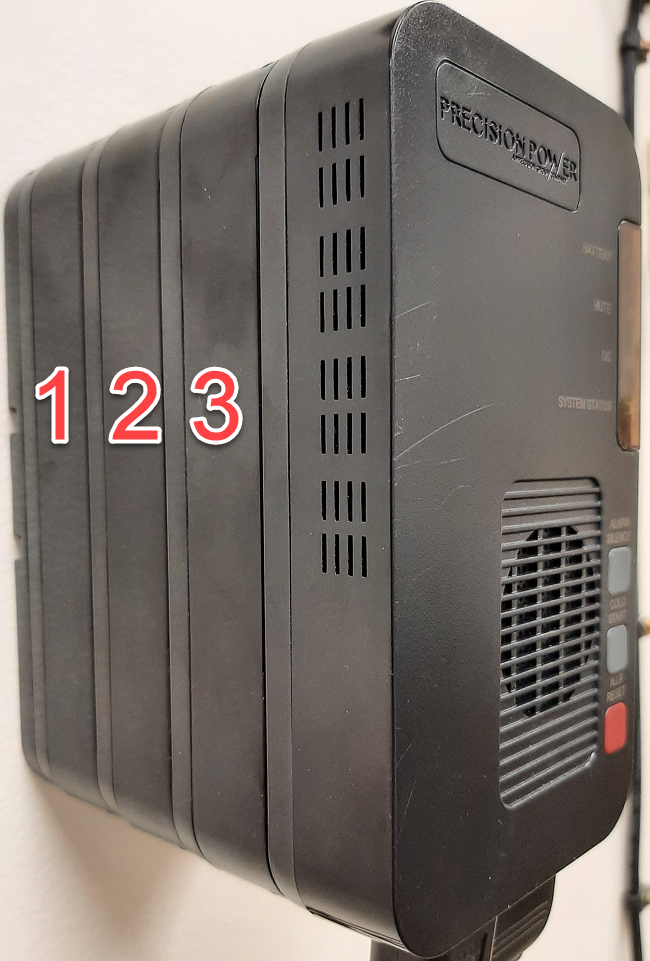
 24 hour battery back-up will have 3 batteries, while an 8hr battery back-up will have only 1 battery.
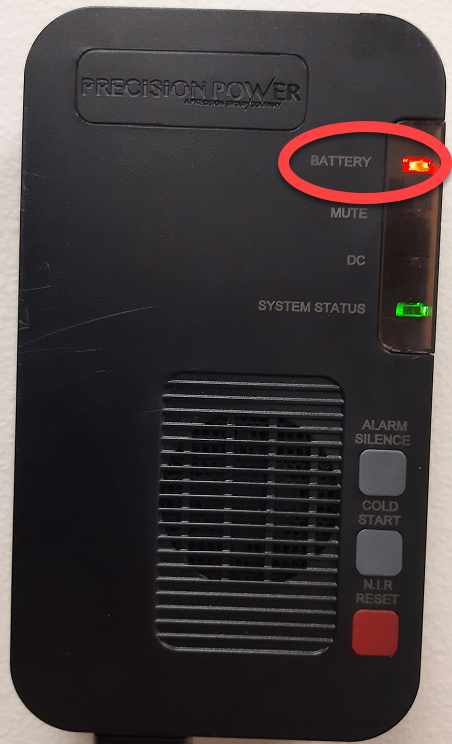
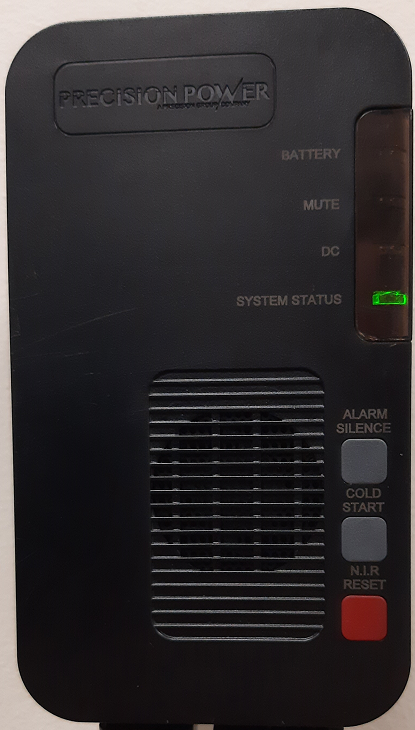 The only light that should be on after battery replacement should be a green SYSTEM STATUS light
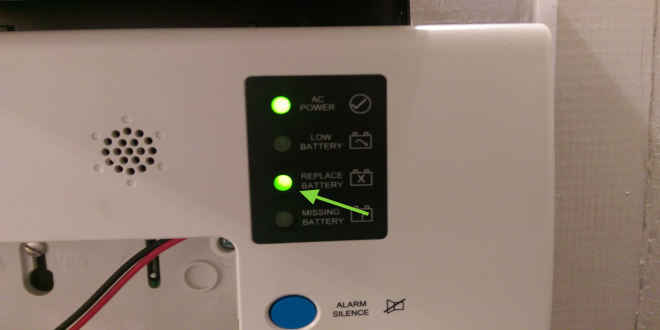 Open the battery compartment cover on the battery backup device. Depress the small textured area on the bottom of the lid while pulling it away from the housing.
 Next, release the hook-n-loop strap. Be careful to make sure the battery doesn’t fall out! The battery is heavy and can cause damage or injury if it falls out.
 Grasping the battery with one hand, carefully remove the red and black wires from the battery terminals by pulling firmly on them with your other hand.
 When the battery is disconnected, the Missing Battery light illuminates.
 Holding the new battery, reconnect the red and black wires. The battery terminals are color coded, so just match the red wire to the red terminal and the black wire to the black terminal.
 Carefully place the battery back inside the enclosure and replace the hook-n-loop strap.
 Finally, replace the battery compartment cover. The Missing Battery and Replace Battery lights should now go out within 15 minutes.

 Depress the recessed tab on the backside of the backup, and begin sliding the access cover downward, to remove cover.
 Continue to slide the access cover until it is completely separated from the battery backup housing.
 Slide the battery partially out of the battery backup enclosure and disconnect the red and black battery connection wires. Remove the old battery completely from the housing.
 To install the new battery, partially slide the battery into the housing, make sure to connect the red (+) and black (-) battery terminal wires to the red and black marked tabs of the battery.
 With the battery terminal wires connected, slide the battery fully into the housing oriented as shown.
 With the new battery fully inserted into the housing, replace the access cover and slide up, until the cover clicks into place. The RED battery light will go out within 15 minutes.


 Note: Telephony Modems use a Lithium-Ion battery pack. Please recycle or dispose of the battery responsibly and in accordance with local ordinances.

.png "Lebanon_Question_7_part_1-(1).png")

 1 - Battery Compartment 2 - Receiver Slot 3 - Hinge Tab